To learn how to configure the SendGrid with FluentSMTP, follow the steps with screenshots below:
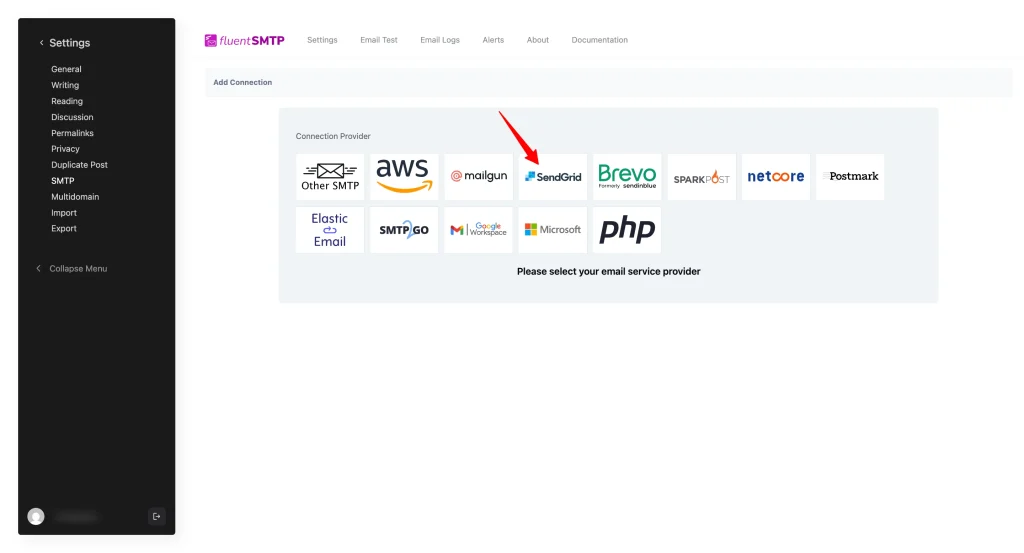
First, go to FluentSMTP from Settings of Negosyo Toolkit Dashboard in the left sidebar, and select SendGrid from the given Connection Providers.
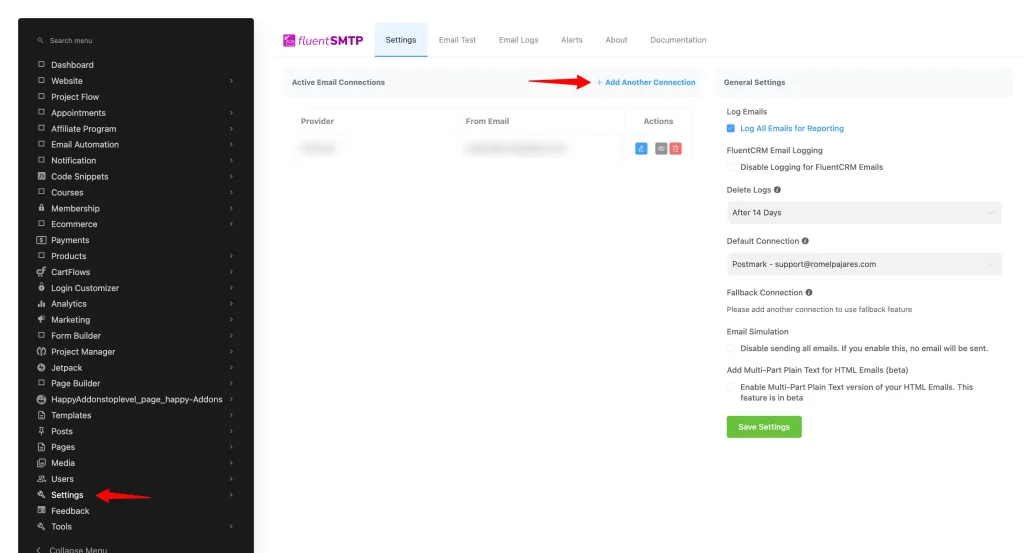
But if you are already connected to any email service provider, go to the Settings section from the FluentSMTP Navbar and click the + Add Another Connection button.
Click the SendGrid tab to connect to this provider.
After you choose the provider, it will take you to the Add Connection page where you will get all the options to connect your SendGrid.
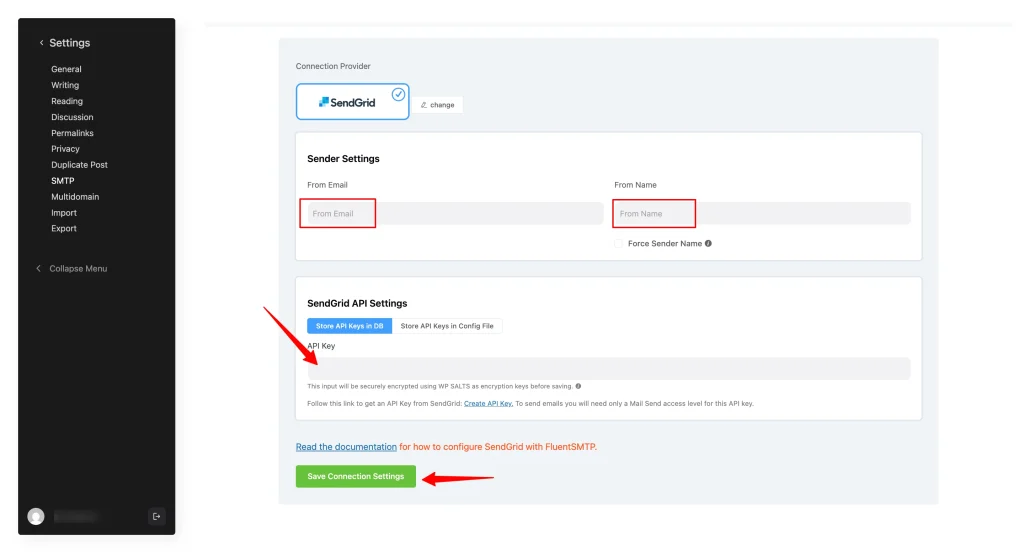
Here, you need to provide:
From Email: The “From Email” should be the email you verified with SendGrid (e.g., “support@samplesite.com”). Use a work email on your private domain (e.g., support@samplesite.com). If you don’t have one yet, contact our support team and we’ll help you set up a work email under your private domain.
Reply To – Set the recipient email address for replies.
From Name: From name can be anything you want. You can use a combination of your name and company name.
Force Sender Name: Check the box to align the return path with the form. This setting indicates where bounce messages are sent. If unchecked, bounce messages will be lost. When enabled, you will receive an email at the “From Email” address for any bounced messages due to recipient email issues.
Get SendGrid API Key
Learn how to get the API Key from SendGrid by following the steps with the screenshots below –
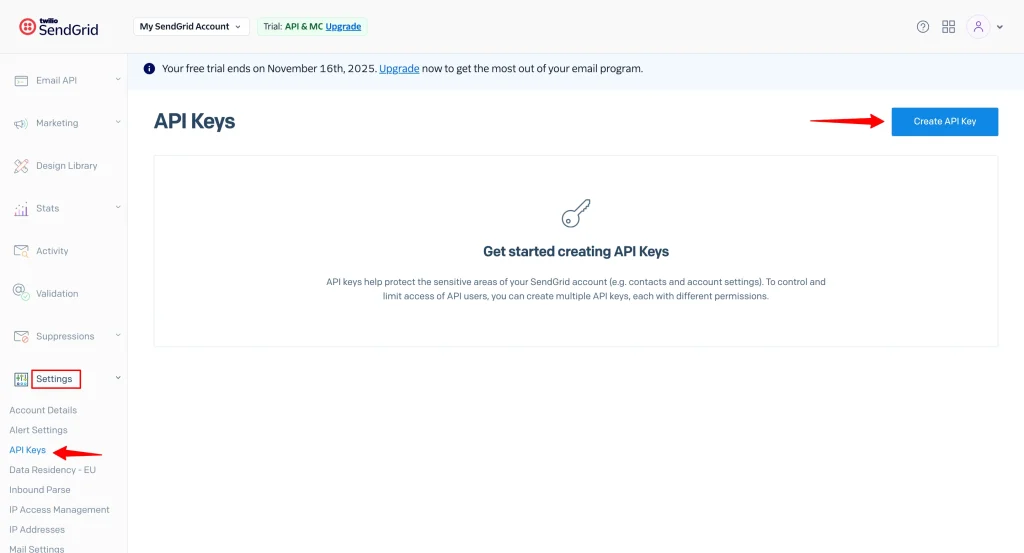
First, log into your SendGrid Account, click the Settings section from the left sidebar, open the API Keys page, and click the Create API Key button.
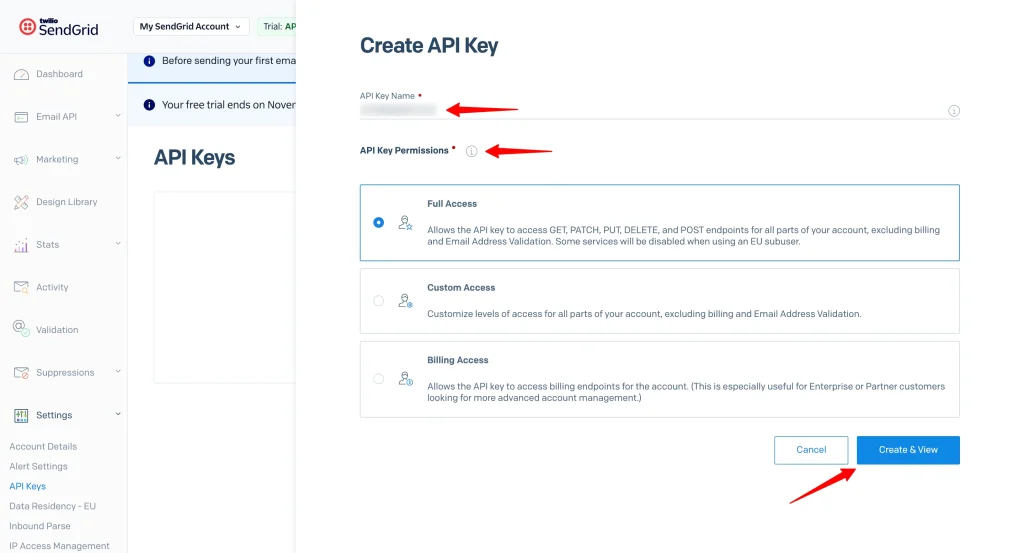
Give your API Key a Name as per your requirements.
Then, give the necessary Permissions according to your needs, click the Create & View button, and your API key will be created.
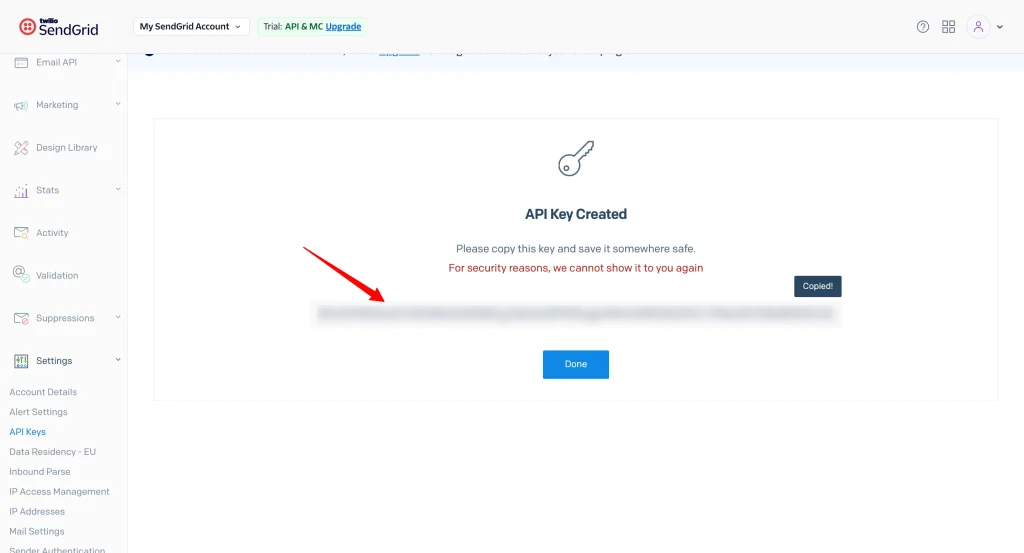
Here, you will get your created API key, simply Copy it.
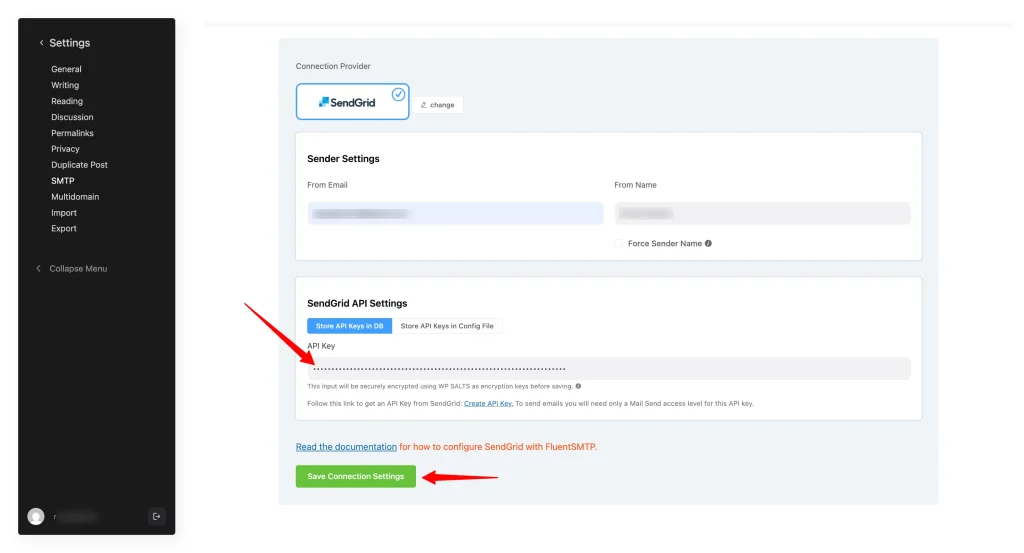
Then, go back to the desired Add Connection page under Settings from the Fluent SMTP Navbar and paste the API Key you copied from SendGrid inside the API Key box.
Once you input all the necessary information, finally, click the Save Connection Settings button.
And, your SendGrid server will be connected to your FluentSMTP.
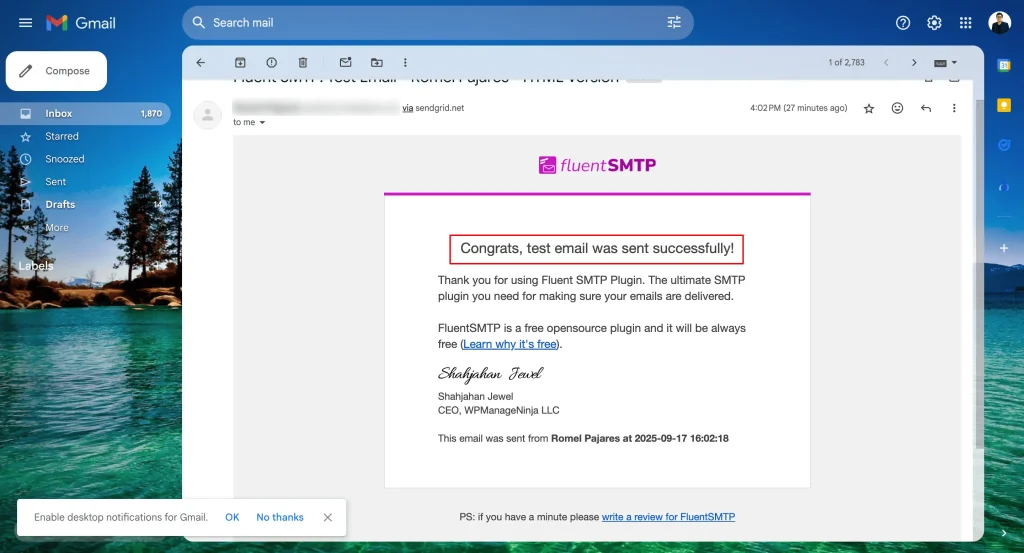
Send a Test Email
Navigate to the Email Test tab and enter the “From Email” address, ensuring it matches the one configured in SendGrid.
Important Note:
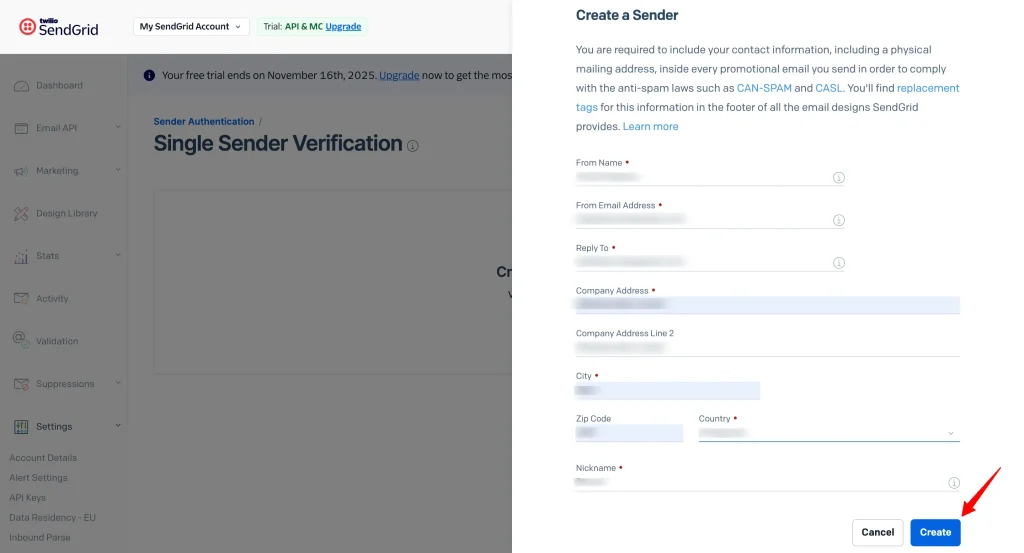
You must configure Single Sender Verification in your SendGrid account. (Skip this step if you’ve already completed it.
Fill in the required details:
- From Name – The name that will appear as the sender.
- From Email Address – Use a work email on your private domain (e.g., support@samplesite.com).
- If you don’t have one yet, contact our support team and we’ll help you set up a work email under your private domain.
- Reply To – Set the recipient email address for replies.
- Company Address, Zip Code, Country, and Nickname – Enter your company details.
Once done, click Create.
Verifying SMTP Connection via SendGrid
To verify the SMTP connection, send a test email again.
✅ If the configuration is successful, you will receive a confirmation email indicating that your test email was sent successfully.